Waterpik™ Magnetic Slide Strip Shower Head Installation, Operation, and Removal Instructions
Prior to Installation
- Make sure wall is clean and dry.
- No tools are necessary but a level can be used to ensure proper alignment.
- Remove old shower head and remove all pipe tape.
- Make sure that the washer from the old shower is not connected to the pipe. Use a thin utensil to check inside the pipe for washers, like a pencil or screw driver. Do not use your fingers.
- An extra adhesive pad is included if needed.
Note: The slide strip requires 12–24 hours to fully adhere to the wall.
Very Important! One-Time Use Only
Adhesive pads will only adhere to the wall once. Do not attempt to reposition. Do not remove backings from the slide adhesive pads until you have used the template to find desired position. Do not touch the adhesive on the back of the pads - the oil on your fingers will decrease effectiveness of the adhesive.
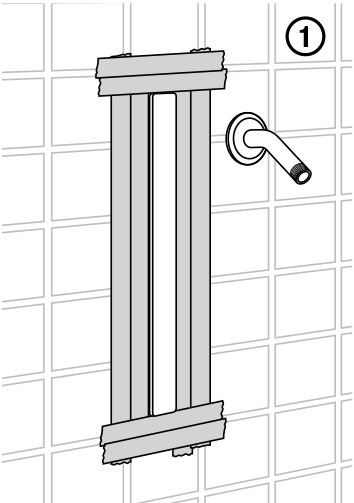
Installing the Slide Strip
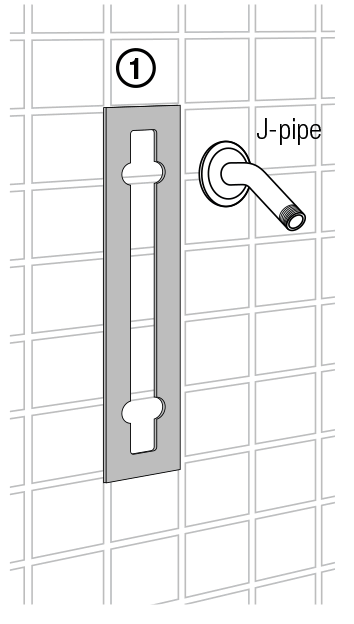
1. Use the template provided to determine the desired location of the slide strip next to your shower pipe. Tape the template vertically to your wall with masking tape or duct tape.
Placement Recommendations- Install to the right or left of shower pipe so the hose isn’t in the way during use.
- Do not install directly under shower pipe.
- Placement height will depend on household members’ height.
- To check alignment and height, hold up shower head to strip to confirm desired position. The adhesive pads allow for one time use and cannot be repositioned so it’s important to use the template.
Note: to ensure proper alignment of the slide strip, a level can be used. If you have shower tiles, you can use the lines of the tile to properly align with gridlines on the template.
2. Once you have confirmed your slide strip position, use the pre-adhesive wipe to clean the area inside the template. Let the area dry for one minute. Once it is dry, peel off burgundy color tape backing from the adhesive pads. Place the slide strip (with adhesive exposed) inside of the template and apply pressure with your hands for 20 seconds. Remove template. If possible and for best results, do not use shower for 24 hours (minimum 12 hours).
Wipe Use:
- Avoid contact with eyes.
- Wash hands thoroughly after using.
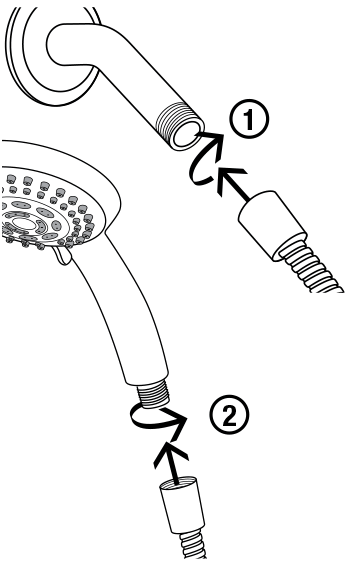
Installing the Shower Head
- Screw the hose onto your shower pipe.
- Screw the other end of your hose onto the shower head.
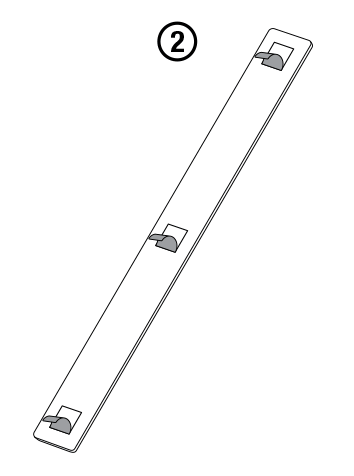
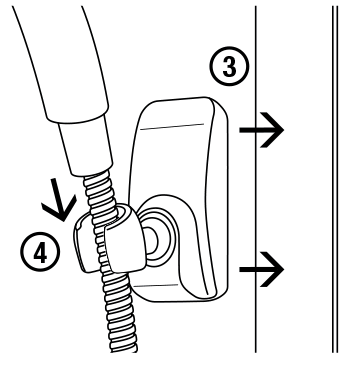
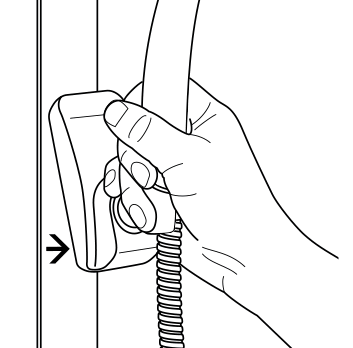
- Place magnetic bracket on the slide strip.
- Place shower handle into bracket.
Operating the Shower Head
To use the hand held spray selector:
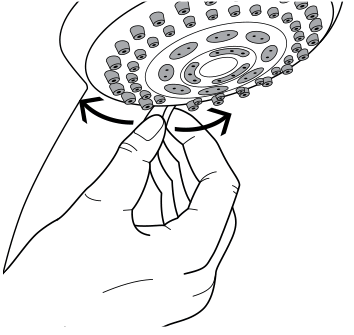
Spray patterns for the hand held shower head are controlled by the small lever that rotates the shower face to the left or right.
To slide position of shower head:
The easiest way to move the shower head is to grasp the bracket at the base of the shower head and lift to release the magnet from the slide. Hold bracket at an angle while you slide up or down to adjust height.
To loosen/tighten shower head holder:
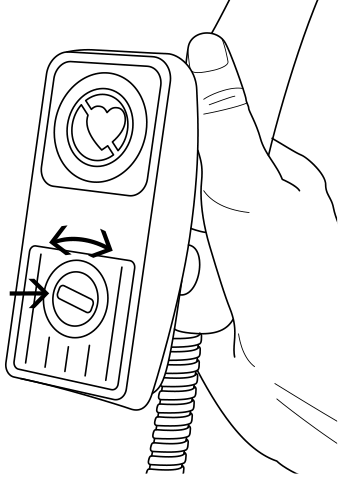
Remove magnetic bracket from slide strip. On the back of the bracket, there is a slot to loosen or tighten the pivot ball. You can do this using a coin or a large bladed screwdriver. To loosen turn the slot counter clockwise, and to tighten turn the slot clockwise.
Removing the Slide Strip
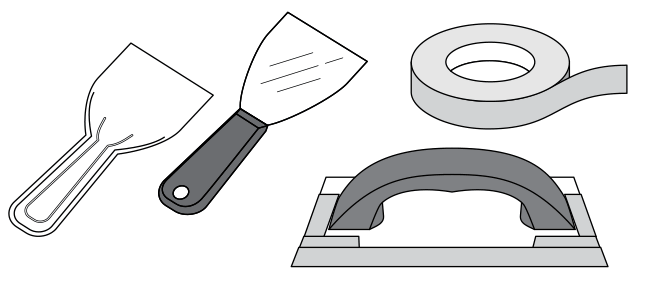
Removal Tools
Masking tape, standard plastic/metal putty knife, or a tile trowel (available at most hardware stores)
-
It is recommended to apply tape around slide strip to protect tile or shower enclosure surface from scratching.
Note: If you are using a tile trowel, cover the blade, except one edge, with duct tape to protect from scratching the surface. A hair dryer can be used to soften adhesive, but be aware that the slide strip will be hot and may cause burns to skin that comes in contact. Exercise caution.
- Use untaped edge of the trowel or blade of the putty knife and slide under the strip.
- Gradually pull down until strip is detached
If there is any debris on the wall after removal, you can use standard rubbing alcohol and a putty knife to rub off.